Connect-Star to Model 204 connection
Overview
Before you can use one or more of the Connect-Star Suite communications interfaces (ODBC, JDBC, and/or .NET Framework), you must verify your connection to the Model 204 data and the ability to access the data in a query. The general steps are as follows:
- Confirm the mainframe connection with the ping command.
- Use the Connect-Star Visual Interface (CVI) to confirm the connection to your Model 204 Online.
Confirming workstation-to-mainframe communication
Confirm the workstation-to-mainframe TCP/IP communication by using the workstation TCP/IP software to "ping" the mainframe on which the Model 204 Online resides:
- Execute the ping command using one of the following methods:
- In the DOS interface, enter the ping command with the IP address of the mainframe:
ping IP-address
- Double-click on a ping icon for your installed TCP/IP software and fill in the IP address.
- In the DOS interface, enter the ping command with the IP address of the mainframe:
- Check the message displayed. If your command reached the TCP/IP address and was returned, you have a communication line to the mainframe. However, this does not mean that you have connected to the Model 204 Online.
- Use the CVI to confirm a connection to the Online. See Installing the Connect-Star Visual Interface (CVI) and Defining the demonstration database to CCACAT.
SQL, RCL and Freeway/204 connections
You can open multiple RCL and SQL connections in the same session.
SQL
When an SQL connection is established to the Model 204 database, the SQL statements are translated by Model 204 at the host, and the results are passed back to the client.
Before executing an SQL statement, check with your Connect-Star administrator to make sure that either the demonstration database is installed and has been defined to the SQL catalog file, CCACAT, or you have other available tables defined in CCACAT. (See SQL catalog population.)
RCL
Using the RCL feature, you can communicate with Model 204 using SOUL and command syntax, wrapped in an SQL delivery vehicle. RCL returns Model 204 responses in a single-column variable-character-width table (up to 255 characters per row). The results are returned logically a line at a time (not using full-screen output).
RCL threads do not require an SQL catalog.
Freeway/204
With Freeway/204 you have access to two SQL and two RCL connections for free. This will require IODEVs 19 and 49 to support SQL and RCL connections. See Defining the user environment (CCAIN) for a discussion of IODEVs and how to set them up.
You must define a process, process groups and links in Model 204.
Installing the Connect-Star Visual Interface (CVI)
Model 204 provides you with demonstration databases and the CVI, so you can run queries to verify your Model 204 SQL installation.
The CVI should be installed before installing any of your Model 204 Connect-Star drivers.
Prerequisite
Before you install you must have the following in your working environment:
Java Runtime 32-bit JRE (minimum version 1.6)
To install the CVI
The CVI is included with the Connect-Star driver download files.
- With your Rocket M204 user ID and password handy, navigate to the Rocket M204 Customer Care page.
- Click the Download client (workstation) files link to go to the Client files for Rocket Software page.
- The Connect-Star drivers and CVI are available in zip format. Click the Download ZIP file link for the Connect-Star drivers (and CVI).
- Click Save as to save the cstar.zip file in your preferred directory. (You will later be prompted for the directory where you want to actually install the CVI.)
- Expand the file in an unzip application, such as WinZip, and double-click the setup_cviv77.exe file.
- The Connect Star Visual Interface Setup Wizard appears. Click Next and select an installation folder, or use the default folder (C:\Program Files\CCA\Connect Star Visual Interface). Click Next.
- Click Install to begin the installation.
- Click Finish to complete the installation.
By installing the CVI you can enable a connection to a data source on Model 204.
Next you will use the CVI to define a data source and then enter a query to check whether you have successfully connected to Model 204. See the following sections for details.
SQL catalog population
The file DEMOTAB.DDL is automatically copied into the C:\\Program Files\CCA\Connect Star for Model 204\CVI folder of each workstation when you install the CVI. The DEMOTAB.DDL file contains SQL Data Definition Language (DDL) statements, which define the Model 204 demonstration databases to the SQL catalog, CCACAT.
Note: The DEMOTAB.DDL file uses DEMO as the schema name. You can either use this name or choose your own. If you choose to use a different schema name, be sure to edit any files you use to replace DEMO with your own schema name.
Defining the demonstration database to CCACAT
To define the demonstration database files to CCACAT:
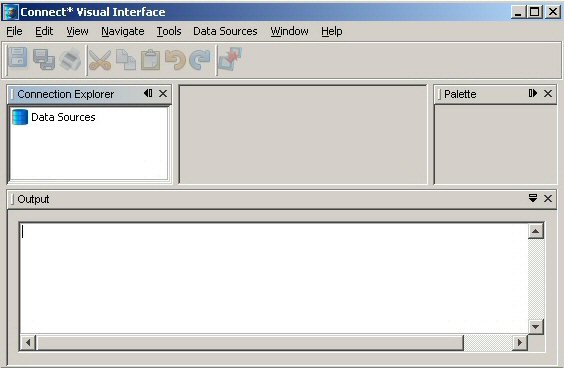
- Open the Connect Star Visual Interface software. To do this, access your programs from the Windows Start menu, open the Connect Star Visual Interface, and click the Connect Star Visual Interface icon. The Connect-Star Visual Interface dialog box opens.
- In the Connect-Star Visual Interface dialog box, select the Data Sources > New option. The Data Source dialog box opens.
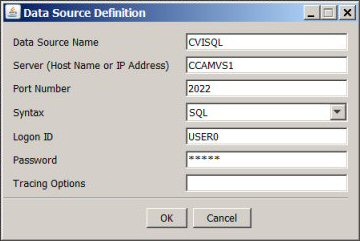
- Define an SQL data source to your Model 204 Online and click OK.
- The CVI dialog box is displayed. On the menu bar click Data Sources > Connect to establish a connection, then click OK in the message box. This step verifies your Model 204 Online connection.
- Click the rightmost execute icon to execute the displayed "SELECT * FROM CATALOG.TABLES". This step verifies your SQL Catalog installation.
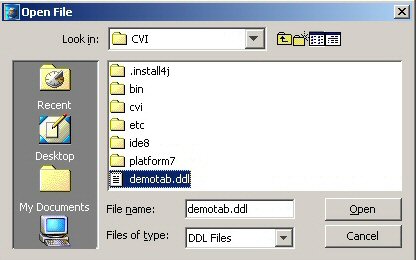
- To use DEMOTAB.DDL as the input file, Select File > Open File and navigate to the installation folder. Select the demotab.ddl file.
- Click on the Execute icon or enter Ctrl + Shift + X.
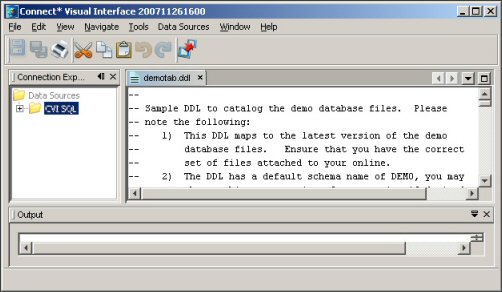
Successful execution of the demotab.ddl displays a message Execution Completed in the Output panel.
- To verify definitions in CCACAT click on File > New File. Select SQL as the file type, then enter a file name.
- In the New File dialog box type the following SQL query and click Execute.
SELECT COUNT (*) FROM DEMO.CLIENTS;
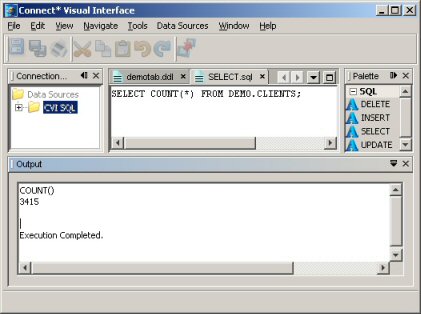
- Do one of the following: click in the Output field to Clear, Save As...., or Print the output.


Creation of your own DDL input file
You can create the input file using one of the following:
- Table Specification Facility (CCATSF) subsystem running under Model 204
- Text editor to create DDL statements manually
- Third-party application that produces standard SQL DDL
Note: The DDL input file that you submit to CVI must use statement delimiters. See SQL DDL from the Table Specification Facility for information about using the CCATSF subsystem. You can run queries against this database using an application such as Microsoft Query.
You can use another optional Model 204 mainframe subsystem, CCACATREPT, to report on CCACAT.